6. Comparison modes
Compare two versions of a proof to see exactly what changed. This is the fastest way to verify that a designer made only the requested changes, and nothing else.
6.1 Open the compare screen
- Open the proof card menu.
- Select "Compare" or "Compare revisions".
- Choose the two versions to compare.
You can also open compare from the version history inside the review screen. The compare toolbar shows the path: workspace ▸ project ▸ proof. Use the back arrow ("Go back to review") to return.
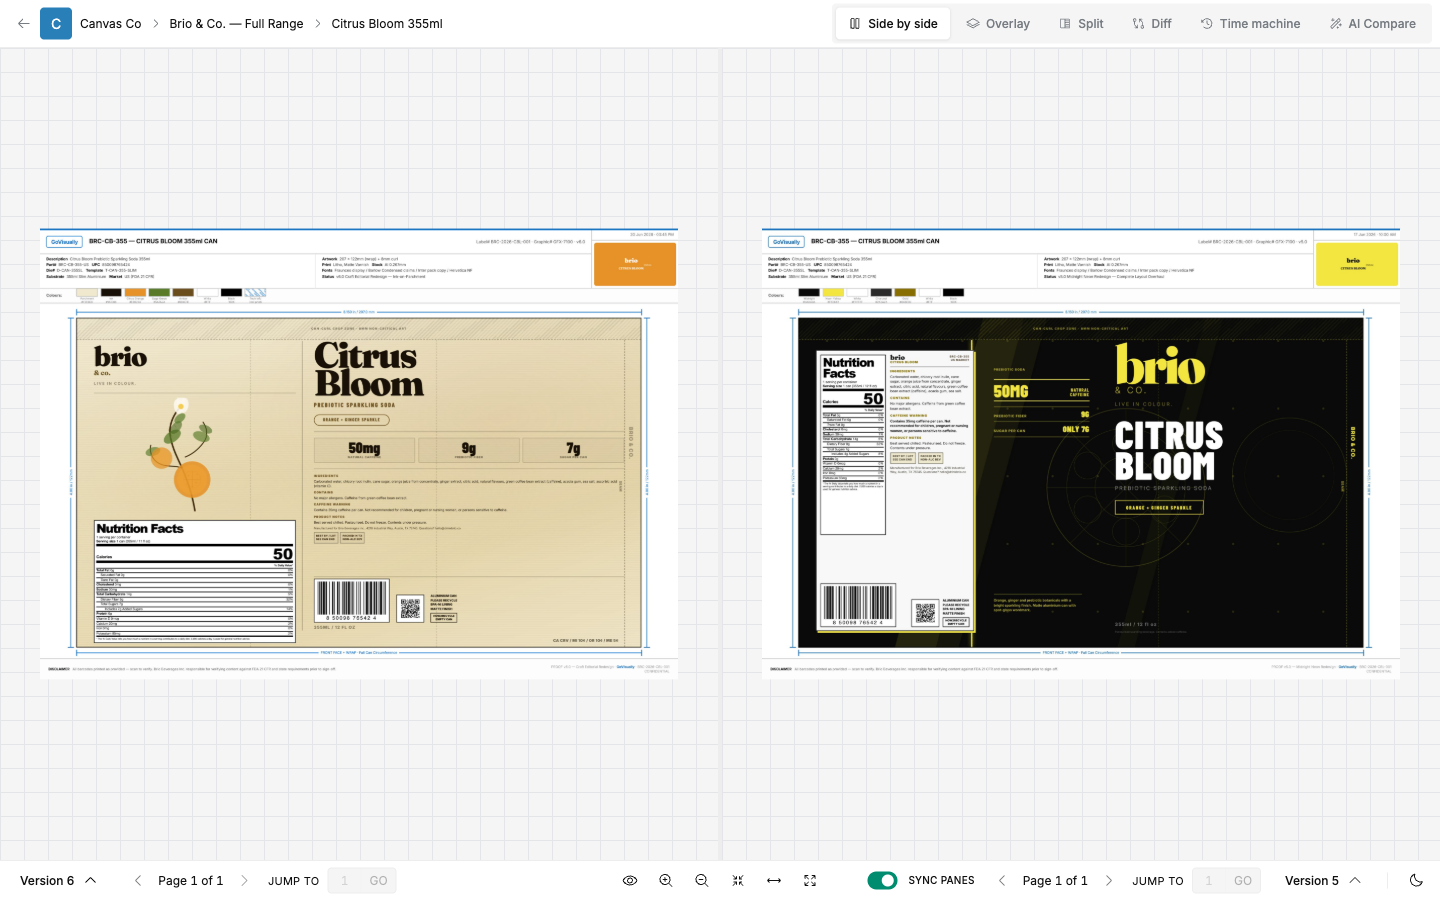
6.2 The five modes
| Mode | What you see | Best for |
|---|---|---|
| "Side by side" | Both versions next to each other. | A first pass. Reading both versions of a text block. |
| "Overlay" | One version on top of the other. | Spotting moved or resized elements. |
| "Split" | One image with a draggable divider between the versions. | Inspecting one area closely. Sweep the divider across a nutrition panel. |
| "Diff" | Differences highlighted between the two versions. | Catching every changed pixel. Verifies that nothing changed outside the requested fixes. |
| "Time machine" | Step through all versions in order. | Reviewing the full history of a long-running artwork. Plan feature. |
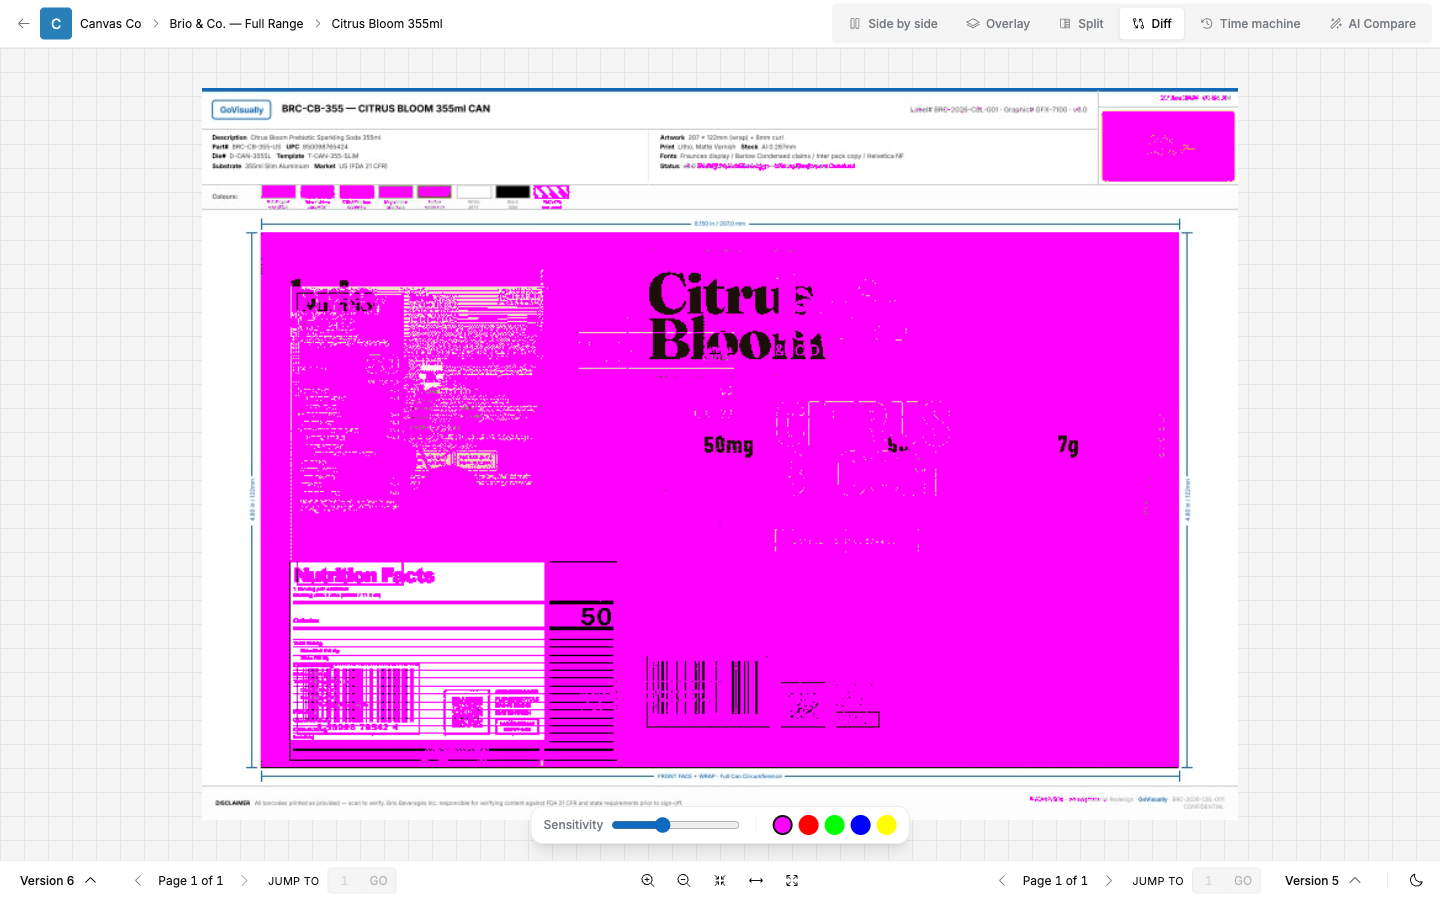
Tips:
- Comparison works best when both versions are the same file type. The upload window reminds you: "For accurate side-by-side comparisons, use the same file type as the previous version."
- Comparison renders in your browser. Give large PDFs a moment to load.
6.3 Compare video proofs
Video proofs have their own compare screen. Open it the same way. You can play both versions together and check them frame by frame.
6.4 "AI Compare"
The compare toolbar links to "AI Compare", which opens the "Print Proof Checker". Use it to compare a printer's proof against your approved artwork, with AI checking of copy, barcodes, and print marks. See chapter 11 for where it lives, and ask your admin whether your plan includes it.
6.5 How each role uses compare
- Designer: before requesting review, run "Diff" against the previous version to self-check your changes.
- RA: after a correction round, use "Diff" to confirm only the flagged text changed. Then re-check the changed areas.
- Pre-press: use "Split" to inspect trap and bleed areas between the design version and the print-ready version.